Babushkini Oladushki
Another childhood favorite is ladushki, also known as “oladi.” These pancakes are made from kefir, which is fermented milk made from a starter. Oladi is typically a breakfast dish but you can eat it at anytime during the day!
This recipe makes about 10-15 pieces of small to medium size pancakes. I prefer to cook smaller size pancakes for a variety of reasons, but primarily because it helps with digestion to eat in smaller quantities, and also it is easier for me to cook it this way. If you are going to be making larger size pancakes, then you can still use the same ingredients and quantities but swap the ice cream scooper for a larger spoon.
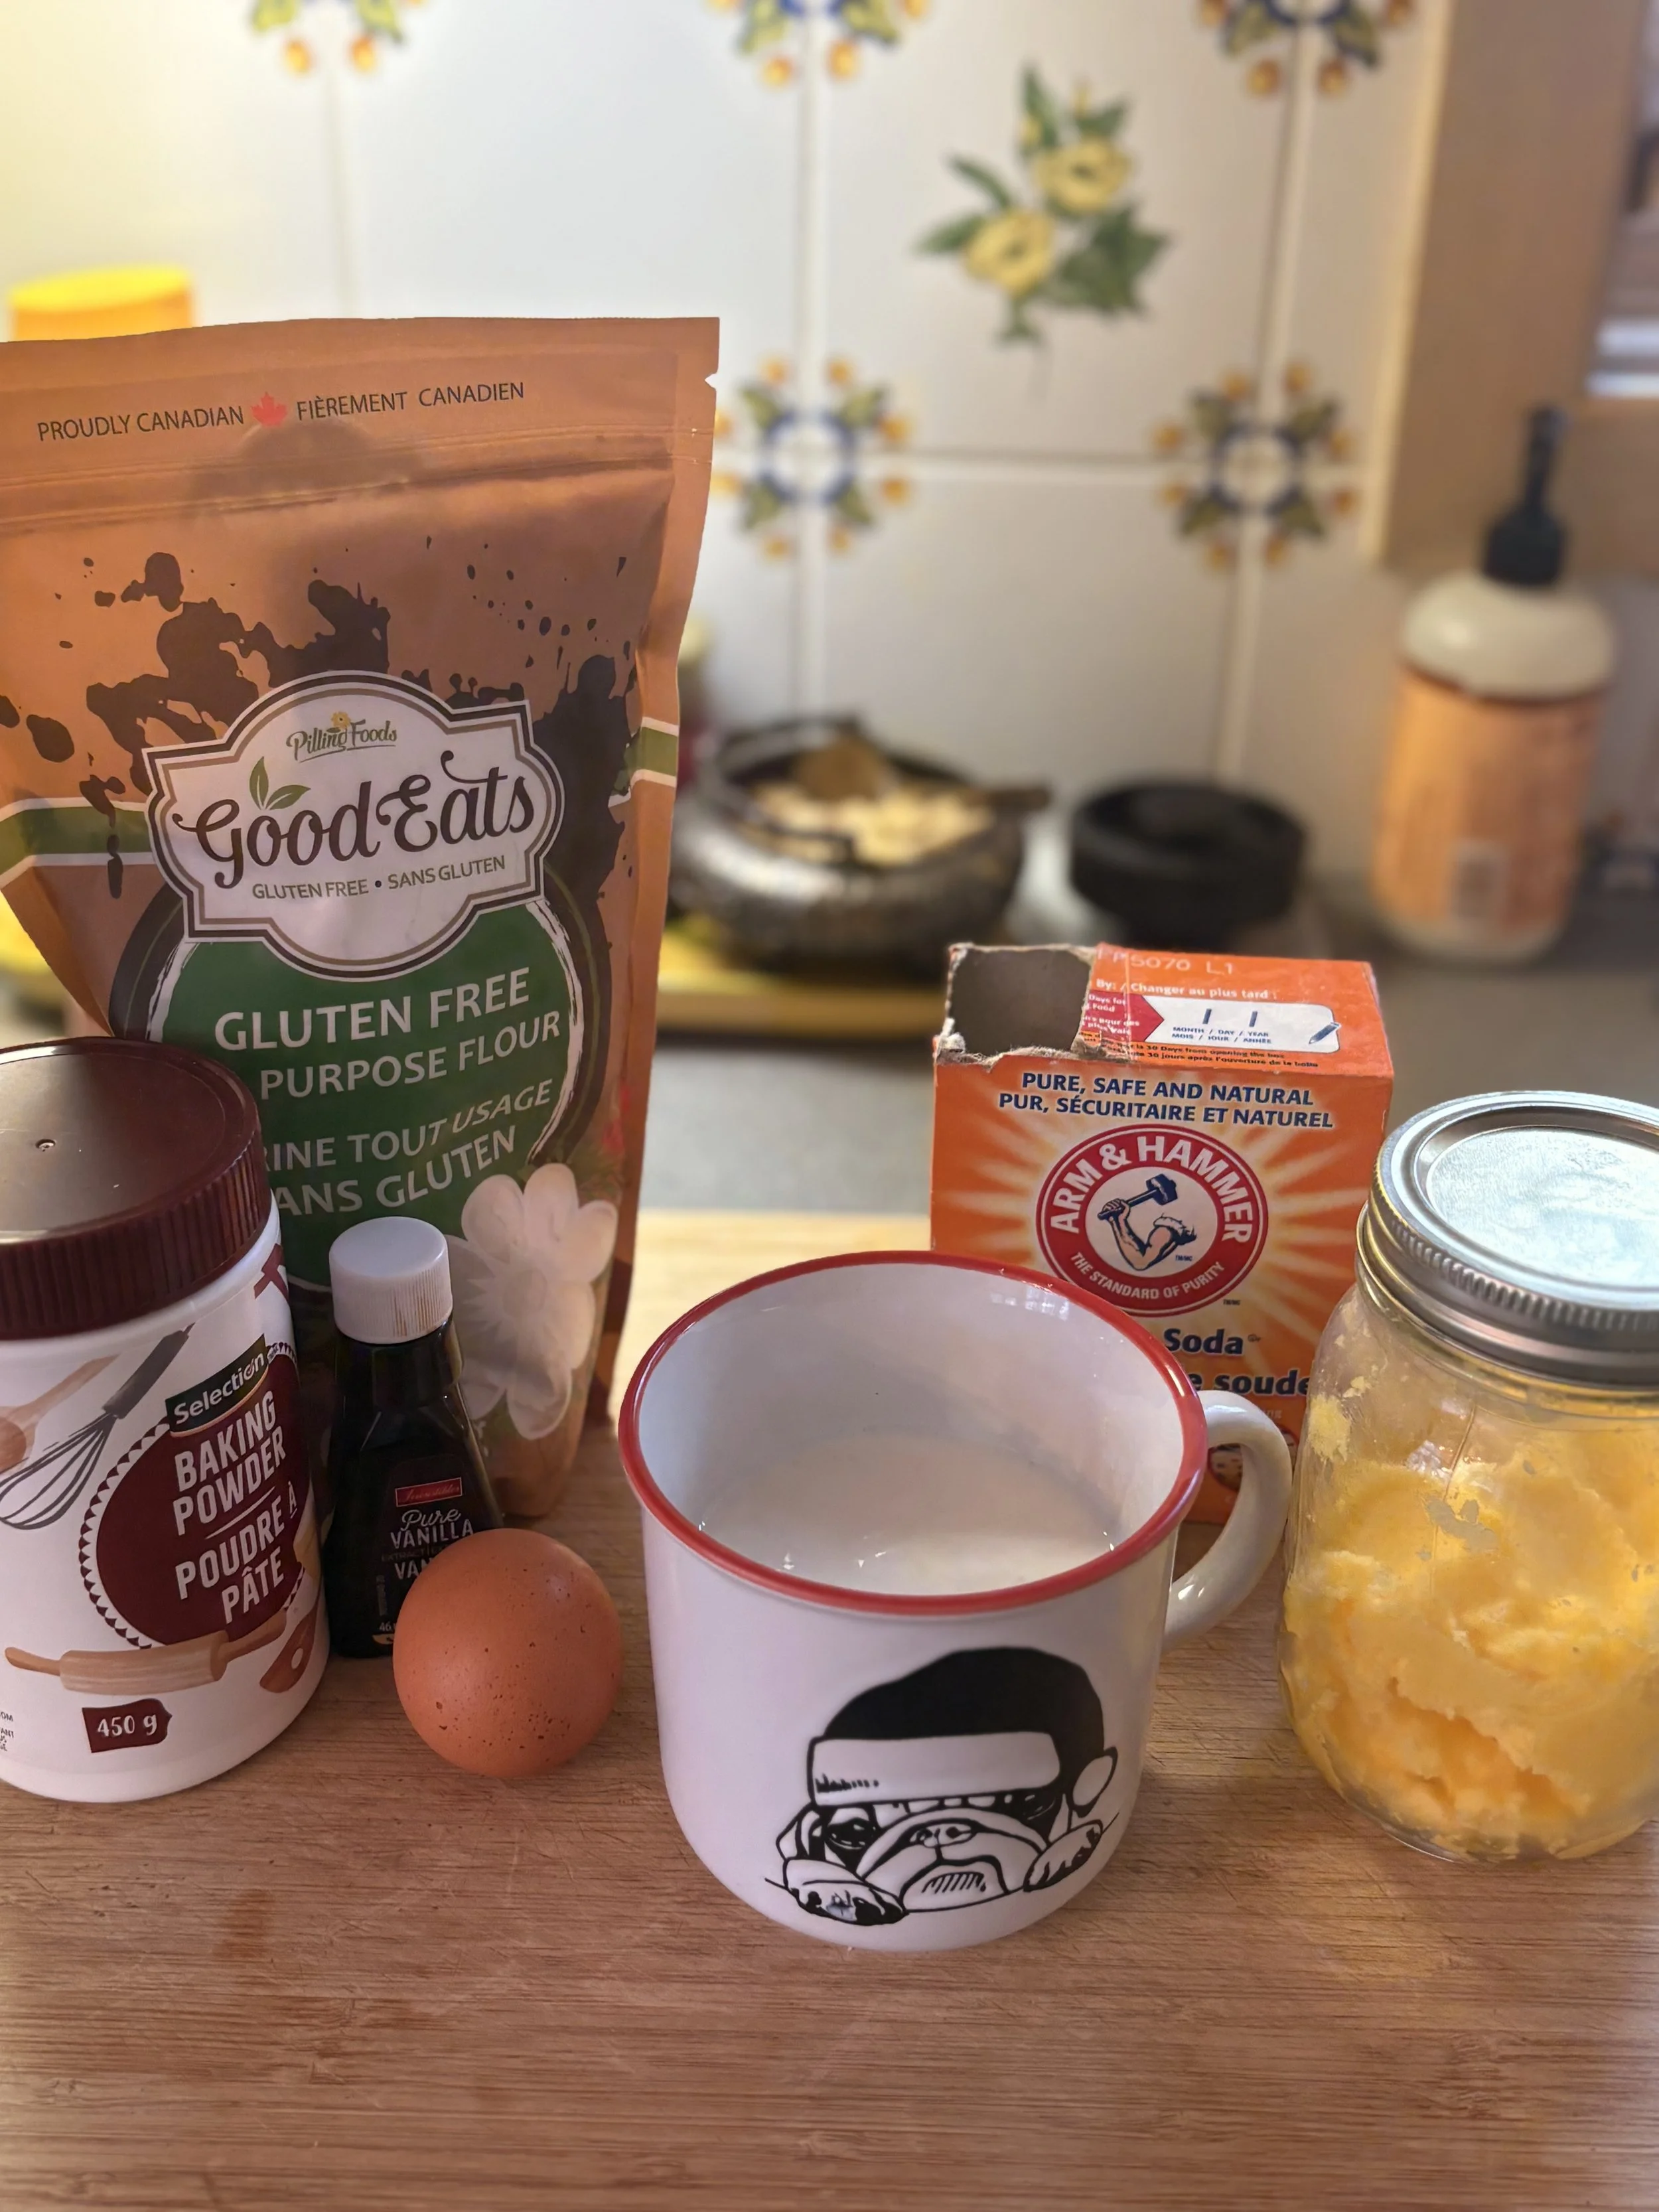
Here is the list of ingredients that you need to make these pancakes.
1 cup of kefir - room temperature
1 egg
1/8 cane sugar
1/4 tsp sea salt
1/2 teaspoon of baking soda
1 teaspoon of baking powder
1 cup of gluten free flour
1/2 tsp of vanilla extract
ghee butter (as needed)
Here are the cooking tools needed:
small skillet (ideally, cook on a carbon coated stainless steel, non stick)
measuring cup
measuring spoons
spatula
large mixing bowl
Ice cream scooper
Here’s the recipe:
Before you make the pancakes, make sure that the 1 cup of kefir is room temperature. I would let it sit for a few hours if possible, or at least 1 hour so it is no longer cold.
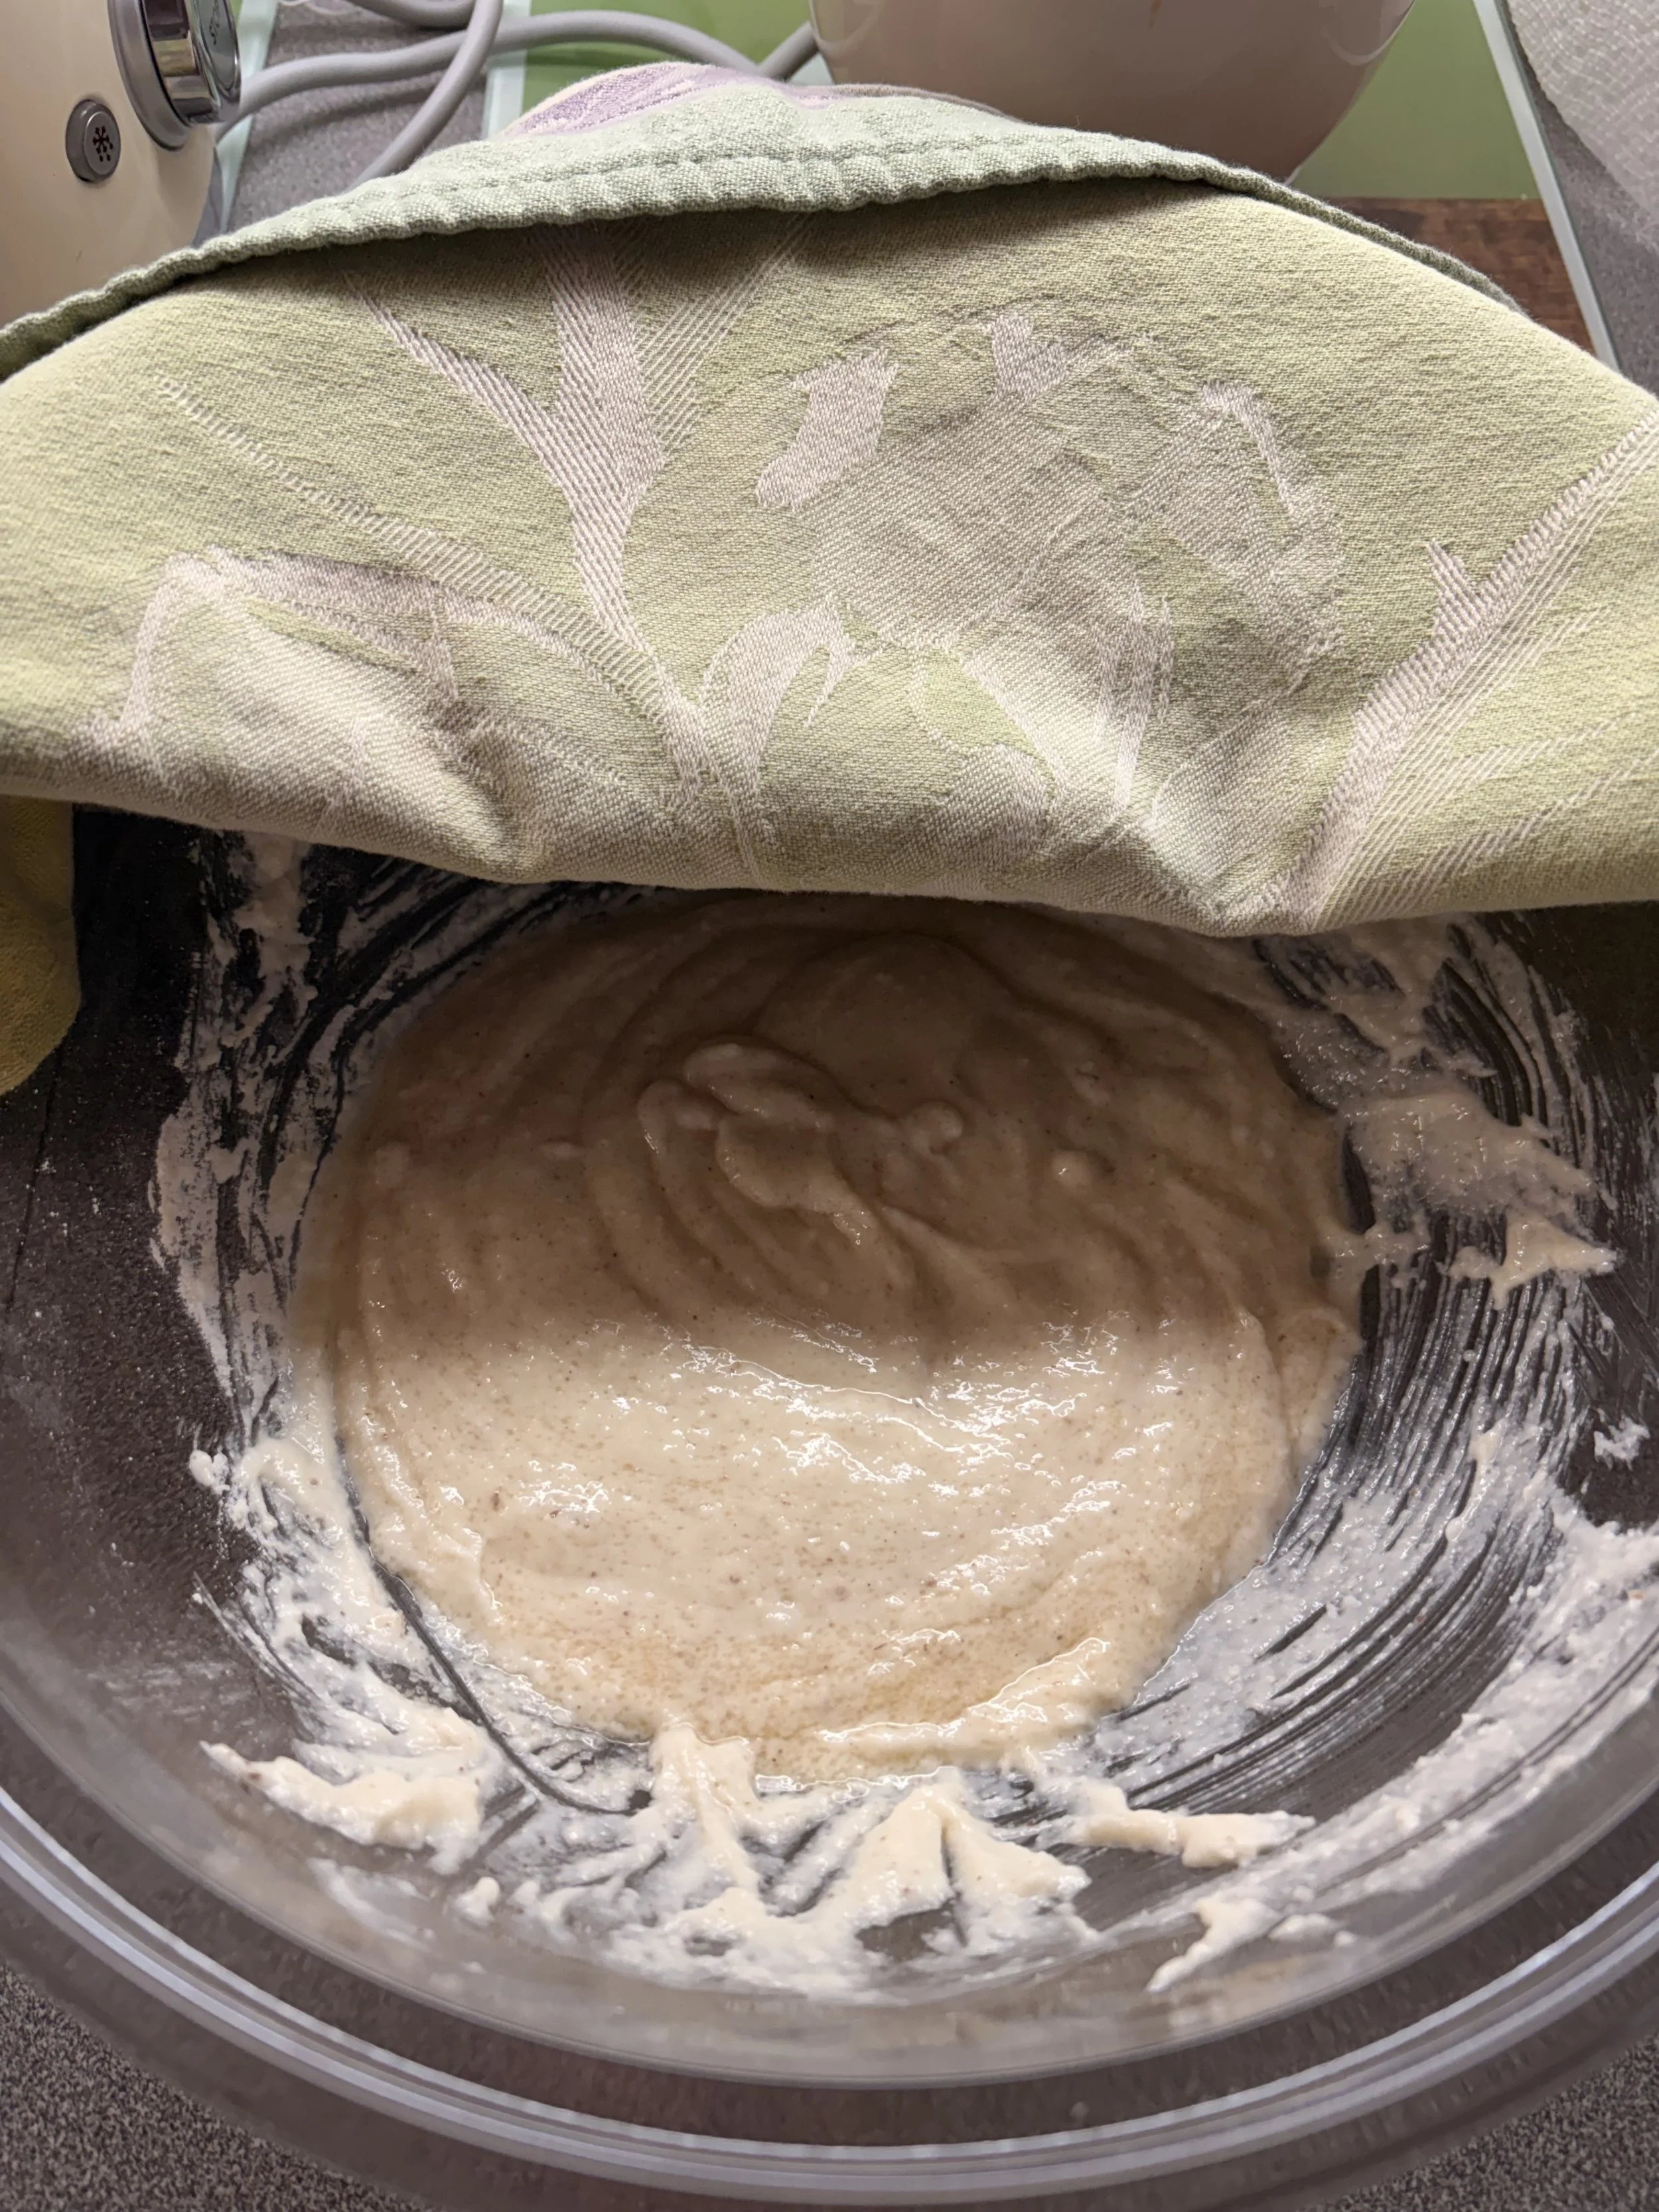
Add the gluten free flour, baking soda, baking powder, salt and a bit of sugar into a large mixing bowl. Use a fork and sift through the flour mixture so that all ingredients are well mixed.
Add kefir and egg. Add more of the sugar and mix. Try to mix it really well because the mixture will be a bit clumpy. Continue to add sugar as you mix and then add the vanilla extract at the end. Taste as needed to see if you want to add more sugar. I used 1/8 cup of sugar because I can’t eat a lot of sugar, but if you like it more sweet, then you can aim for 1/4 cup.
Once the dough is well mixed, it should no longer be clumpy or have any air bubbles. Put a towel over the bowl and let it sit for about 30-45 minutes in room temperature. This allows the dough to rise. DO NOT mix the dough after it has risen.
Once you are ready to fry, take out your skillet and add some ghee butter. I used about 1.5 tablespoon of ghee butter to grease the skillet and evenly coat it for frying. Set your temperature at a medium to start but once you start to fry, you should lower the heat to a low. My stovetop is tricky, so I have it set at even heating low, otherwise they burn.
Using an ice cream scooper (I have a small one), scoop up the dough from the bowl. I use less dough b/c I have a smaller skillet and also I like smaller pancakes. Also, gluten free flour does not heat up the same way as regular flour, so be mindful of that. I would start with a small batch of pancakes and improvise on the size as you make more.
Add two scoops onto your skillet, make sure they pancake dough is not crowding your pan. They should not touch otherwise they will cook together and form a long strudel, versus a pancake! :)
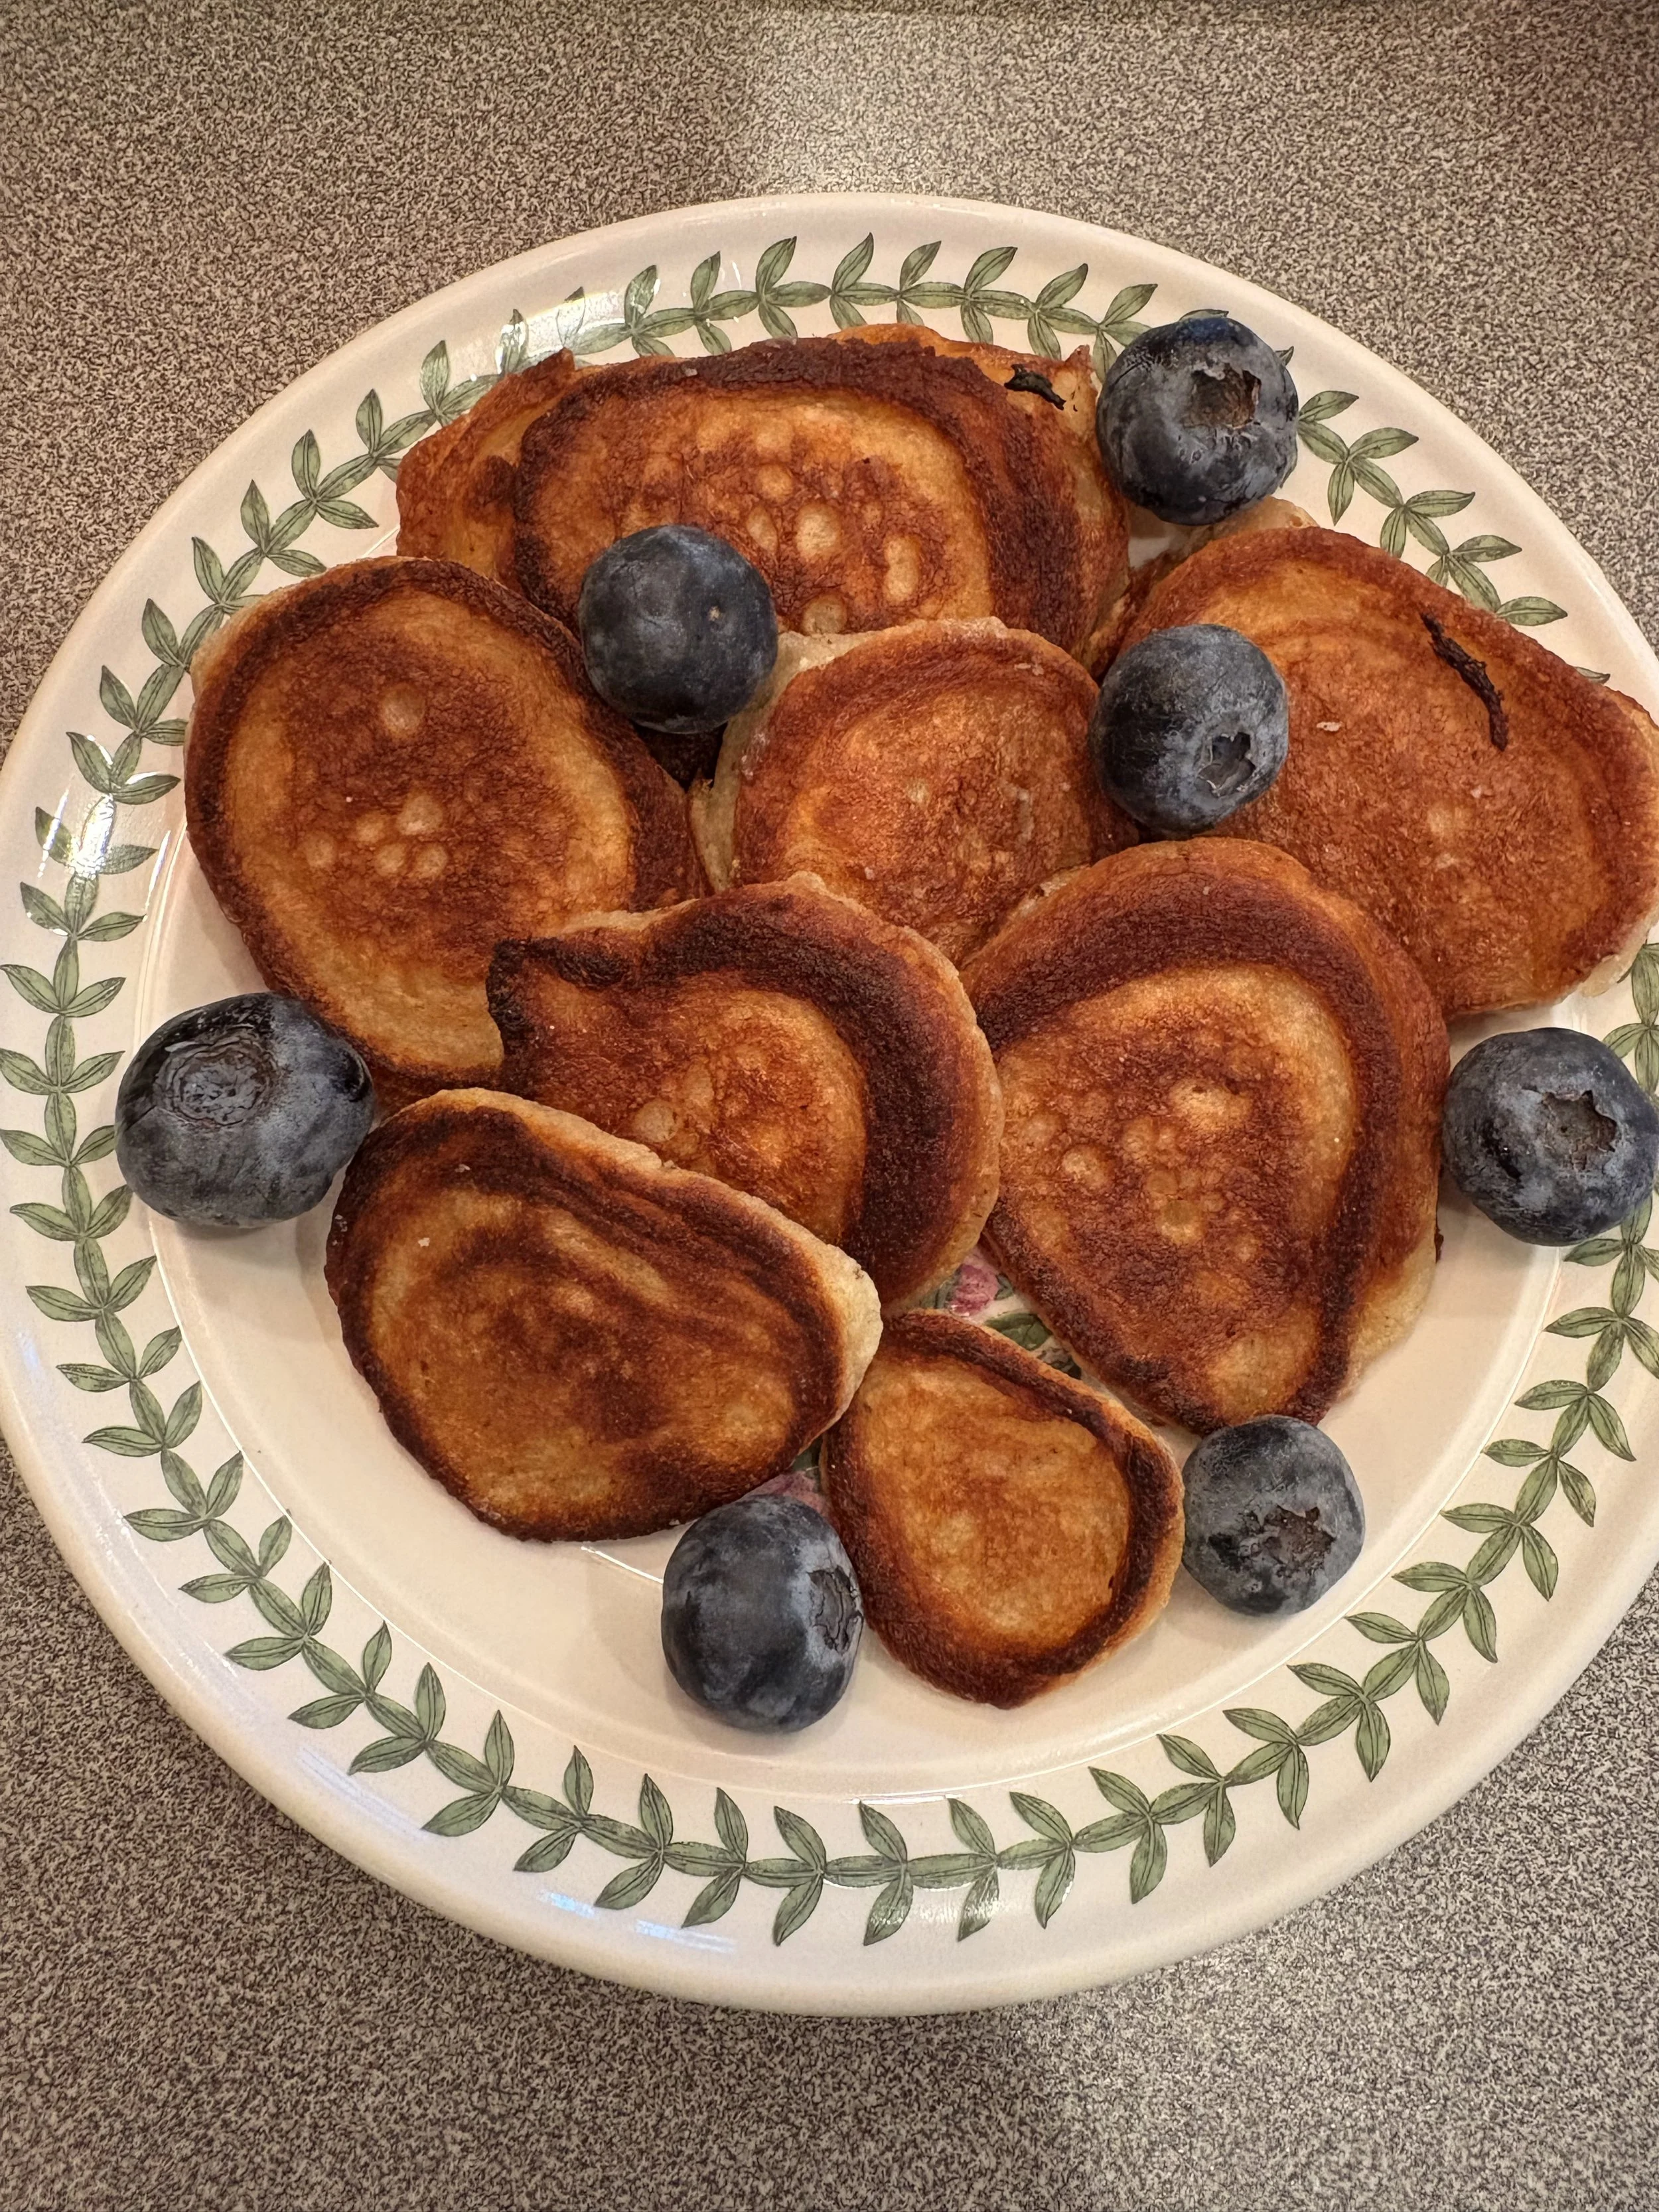
Turn the skillet to a high low and place a lid over. Cook on each side for about 1.5-2 minutes at most. Once the bubbles stop forming, it’s safe to flip them over. If there are lots of bubbles, and the dough is still rising, let it cook a tad more. Once you flip them over, they should be dark golden brown. Cook the other side for 1.5-2 minutes at most. Keep it at a low, especially if you have smaller pancakes, otherwise they will burn.
Once they are ready, set them aside on a side plate. Using the same skillet, add 2 -3 scoops of oladi dough, and an additional 1 teaspoon of ghee butter. You can either use the same oil that you have or add a tiny bit more, like I did.
Lots of recipes recommend adding a lot of oil, but I disagree. It all depends on your skillet, the type of cooking oil that you are using and your comfort level when it comes to frying. I am not good at frying; the sound and sight of sizzling oil scares me. I prefer to have less oil, fry at lower temperature and let it cook through with a little more time. The oil needs to enough so that your pancakes don’t stick to the pan, but you don’t need to coat it like you would in deep frying methods. Think of this as shallow fry!
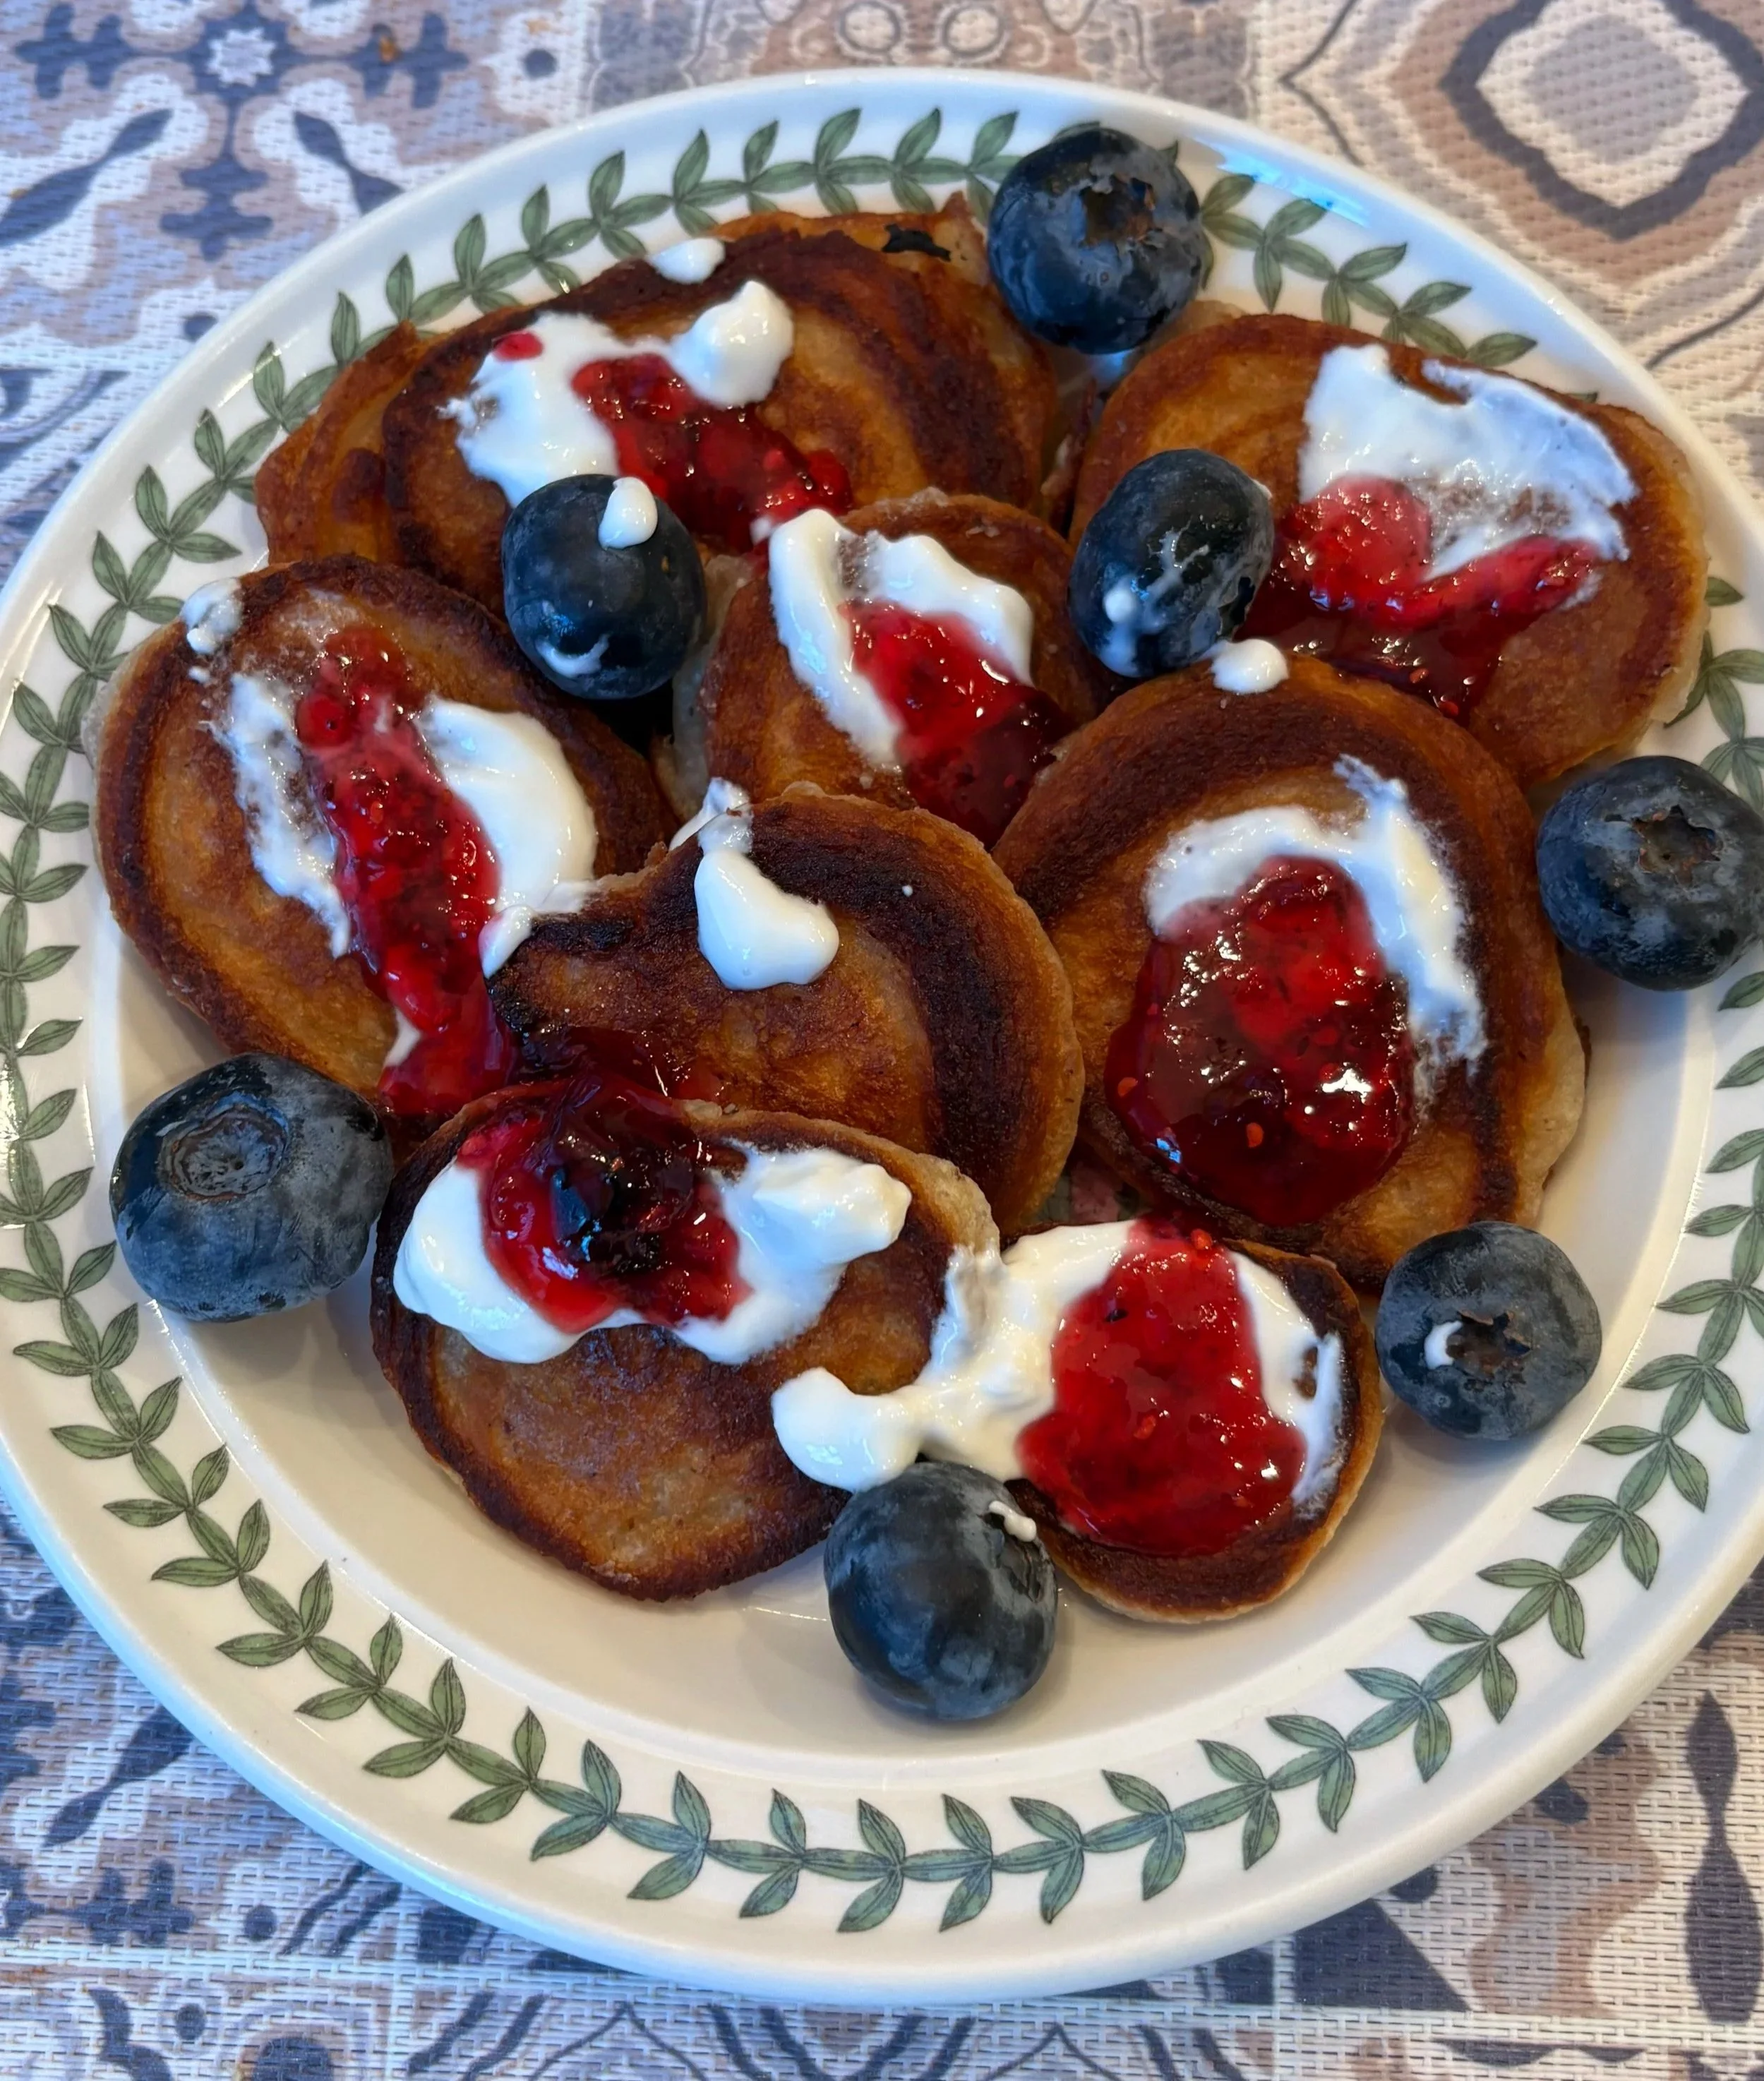
Once you set them aside, they will continue to cook a bit more even when they are no on the stove. Once you have made your batch of 10-15 pancakes, add some yogurt or jam on top. I use yogurt vs sour cream for health benefits, but you can use either. Serve it with love and care to your family and friends!